SpringCloud补充
依赖版本
| 依赖 | 版本号 |
|---|---|
Spring Cloud |
2021.0.4 |
Spring Boot |
2.6.11 |
spring-cloud-starter-netflix-eureka-server |
3.1.4 |
spring-cloud-starter-openfeign |
3.1.4 |
微服务
微服务主旨是将一个原本独立的系统 拆分成多个小型服务,这些小型服务都在各自独立的进程中运行,服务之间通过基于HTTP的RESTful API进行通信协作。
在微服务的架构下,单体应用的各个业务模块被拆分为一个个单独的服务并部署在单独的进程里,每个服务都可以单独的部署和升级。这种去中心化的模式使得后期维护和开发变得更加灵活和方便。由于各个服务单独部署,所以可以使用不同的语句来开发各个业务服务模块。
Spring Cloud
Spring Cloud是一个基于Spring Boot实现的微服务架构开发工具。它为微服务架构中涉及的配置管理、服务治理、断路器、智能路由、微代理、控制总线、全局锁、决策竞选、分布式会话和集群状态管理等操作提供了一种简单的开发方式。Spring Cloud的诞生并不是为了解决微服务中的某一个问题,而是提供了一套解决微服务架构实施的综合性解决方案。
Spring Cloud Eureka服务治理
Eureka是由Netflix开发的一款服务治理开源框架,Spring-cloud对其进行了集成。Eureka既包含了服务端也包含了客户端,Eureka服务端是一个服务注册中心(Eureka Server),提供服务的注册和发现,即当前有哪些服务注册进来可供使用;Eureka客户端为服务提供者(Server Provider),它将自己提供的服务注册到Eureka服务端,并周期性地发送心跳来更新它的服务租约,同时也能从服务端查询当前注册的服务信息并把它们缓存到本地并周期性地刷新服务状态。这样服务消费者(Server Consumer)便可以从服务注册中心获取服务名称,并消费服务。
搭建Eureka-Server服务注册中心
首先搭建一个父项目,springcloudinit,pom.xml如下
<?xml version="1.0" encoding="UTF-8"?>
<project xmlns="http://maven.apache.org/POM/4.0.0" xmlns:xsi="http://www.w3.org/2001/XMLSchema-instance"
         xsi:schemaLocation="http://maven.apache.org/POM/4.0.0 https://maven.apache.org/xsd/maven-4.0.0.xsd">
    <modelVersion>4.0.0</modelVersion>
    <parent>
        <groupId>org.springframework.boot</groupId>
        <artifactId>spring-boot-starter-parent</artifactId>
        <version>2.6.11</version>
        <relativePath/> <!-- lookup parent from repository -->
    </parent>
    <groupId>cc.bnbnlogs</groupId>
    <artifactId>SpringCloudInit</artifactId>
    <version>0.0.1-SNAPSHOT</version>
    <packaging>pom</packaging>
    <modules>
        <module>Eureka-Server</module>
        <module>Eureka-Client</module>
    </modules>
    <name>SpringCloudInit</name>
    <description>SpringCloudInit</description>
    <properties>
        <java.version>1.8</java.version>
    </properties>
    <dependencies>
        <dependency>
            <groupId>org.springframework.boot</groupId>
            <artifactId>spring-boot-starter-web</artifactId>
        </dependency>

        <dependency>
            <groupId>org.projectlombok</groupId>
            <artifactId>lombok</artifactId>
            <optional>true</optional>
        </dependency>

        <dependency>
            <groupId>org.springframework.boot</groupId>
            <artifactId>spring-boot-starter-test</artifactId>
            <scope>test</scope>
        </dependency>
    </dependencies>

    <dependencyManagement>
        <dependencies>
            <dependency>
                <groupId>org.springframework.cloud</groupId>
                <artifactId>spring-cloud-dependencies</artifactId>
                <version>2021.0.4</version>
            </dependency>
        </dependencies>
    </dependencyManagement>

    <build>
        <plugins>
            <plugin>
                <groupId>org.springframework.boot</groupId>
                <artifactId>spring-boot-maven-plugin</artifactId>
                <configuration>
                    <excludes>
                        <exclude>
                            <groupId>org.projectlombok</groupId>
                            <artifactId>lombok</artifactId>
                        </exclude>
                    </excludes>
                </configuration>
            </plugin>
        </plugins>
    </build>

</project>
搭建完父工程后,可以删除无用的src目录。
接下来创建一个新module:Eureka-Server,然后在父工程中的pom.xml加入该module,并且将项目打包方式改为pom。
<packaging>pom</packaging>
<modules>
    <module>Eureka-Server</module>
</modules>
修改Eureka-Server的pom.xml如下:
<?xml version="1.0" encoding="UTF-8"?>
<project xmlns="http://maven.apache.org/POM/4.0.0" xmlns:xsi="http://www.w3.org/2001/XMLSchema-instance"
	xsi:schemaLocation="http://maven.apache.org/POM/4.0.0 https://maven.apache.org/xsd/maven-4.0.0.xsd">
	<modelVersion>4.0.0</modelVersion>
	<parent>
        <!--继承父工程的依赖-->
		<groupId>cc.bnbnlogs</groupId>
		<artifactId>SpringCloudInit</artifactId>
		<version>0.0.1-SNAPSHOT</version>
	</parent>
	<artifactId>Eureka-Server</artifactId>
	<version>0.0.1-SNAPSHOT</version>
	<name>Eureka-Server</name>
	<description>Eureka-Server</description>
	<properties>
		<java.version>1.8</java.version>
	</properties>
	<dependencies>
        <!--web依赖不能少,否则报错-->
		<dependency>
			<groupId>org.springframework.boot</groupId>
			<artifactId>spring-boot-starter-web</artifactId>
		</dependency>

		<dependency>
			<groupId>org.springframework.boot</groupId>
			<artifactId>spring-boot-starter-test</artifactId>
			<scope>test</scope>
		</dependency>
		<!--eureka-server依赖-->
		<dependency>
			<groupId>org.springframework.cloud</groupId>
			<artifactId>spring-cloud-starter-netflix-eureka-server</artifactId>
			<version>3.1.4</version>
		</dependency>
	</dependencies>

	<build>
		<plugins>
			<plugin>
				<groupId>org.springframework.boot</groupId>
				<artifactId>spring-boot-maven-plugin</artifactId>
			</plugin>
		</plugins>
	</build>

</project>
在启动类上添加@EnableEurekaServer注解,表明这是一个Eureka服务端:
@SpringBootApplication
@EnableEurekaServer
public class SpringcloudinitApplication {

    public static void main(String[] args) {
        SpringApplication.run(SpringcloudinitApplication.class, args);
    }

}
配置application.yml
server:
  port: 8761

eureka:
  instance:
    hostname: localhost
  client:
    registerWithEureka: false
    fetchRegistry: false
    serviceUrl:
      defaultZone: http://localhost:8761/eureka/
上面配置了服务的端口为8080,剩下几个为Eureka配置:
eureka.instance.hostname指定了Eureka服务端的IPeureka.client.register-with-eureka表示是否将服务注册到Eureka服务端,由于自身就是Eureka服务端,所以设置为falseeureka.client.fetch-registry表示是否从Eureka服务端获取服务信息,因为这里只搭建了一个Eureka服务端,并不需要从别的Eureka服务端同步服务信息,所以这里设置为falseeureka.client.serviceUrl.defaultZone指定Eureka服务端的地址,默认值为http://localhost:8761/eureka
启动服务后,访问http://localhost:8080
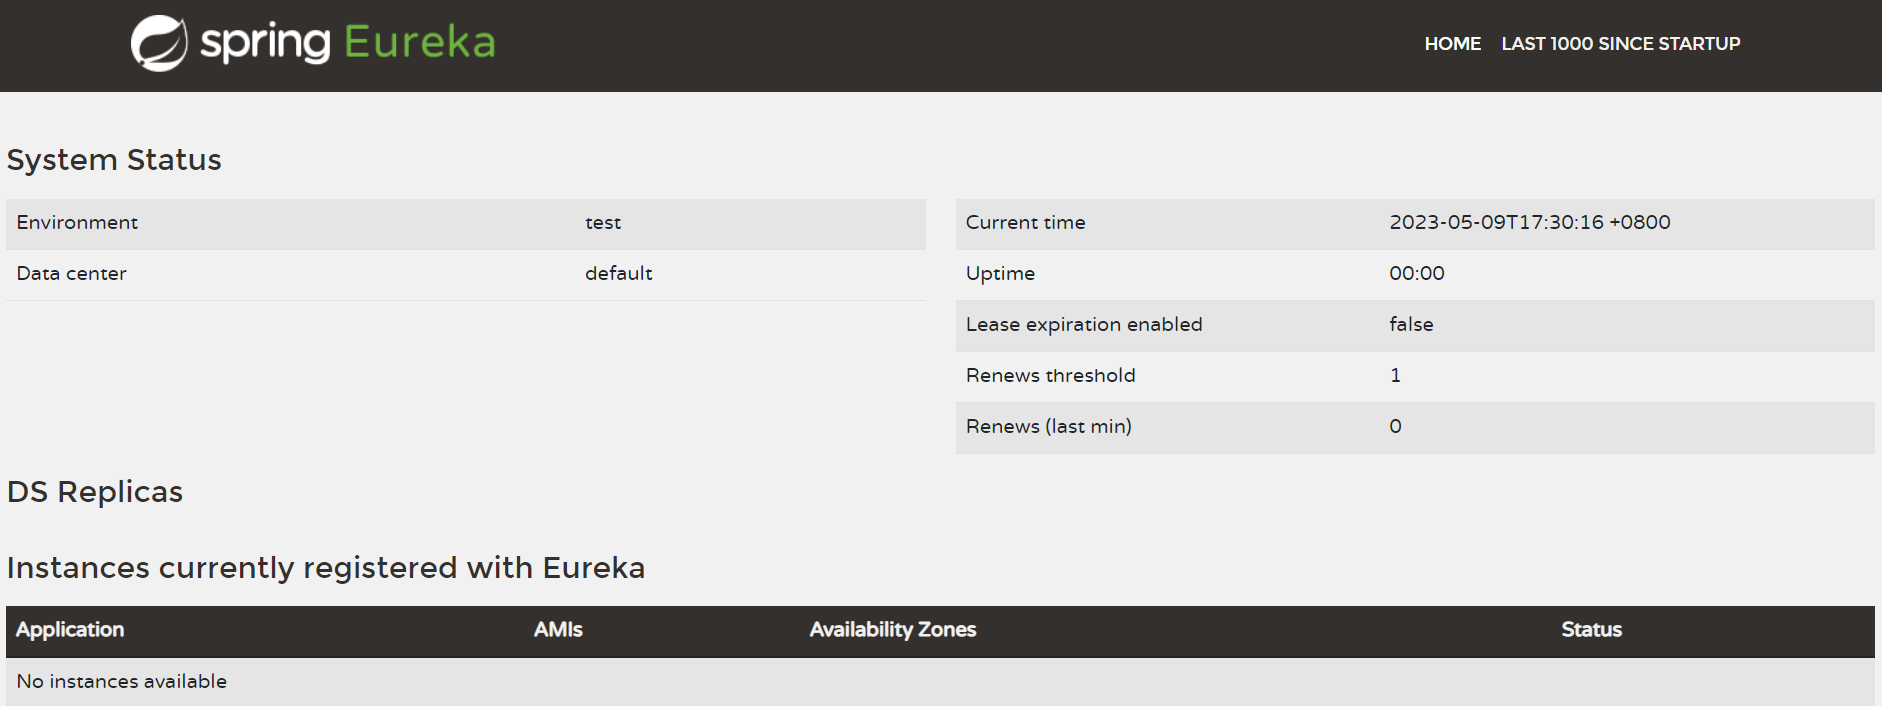
由于当前还没有注册任何服务,所以instances为空
搭建Eureka-client服务提供者
新建一个子模块Eureka-Client,在父工程中引入
<modules>
    <module>Eureka-Client</module>
</modules>
Eureka-Client的配置文件pom.xml如下:
<?xml version="1.0" encoding="UTF-8"?>
<project xmlns="http://maven.apache.org/POM/4.0.0" xmlns:xsi="http://www.w3.org/2001/XMLSchema-instance"
	xsi:schemaLocation="http://maven.apache.org/POM/4.0.0 https://maven.apache.org/xsd/maven-4.0.0.xsd">
	<modelVersion>4.0.0</modelVersion>
	<parent>
		<groupId>cc.bnbnlogs</groupId>
		<artifactId>SpringCloudInit</artifactId>
		<version>0.0.1-SNAPSHOT</version>
	</parent>
	<artifactId>Eureka-Server</artifactId>
	<version>0.0.1-SNAPSHOT</version>
	<name>Eureka-Server</name>
	<description>Eureka-Server</description>
	<properties>
		<java.version>1.8</java.version>
	</properties>
	<dependencies>
		<dependency>
			<groupId>org.springframework.boot</groupId>
			<artifactId>spring-boot-starter-web</artifactId>
		</dependency>

		<dependency>
			<groupId>org.springframework.boot</groupId>
			<artifactId>spring-boot-starter-test</artifactId>
			<scope>test</scope>
		</dependency>

		<dependency>
			<groupId>org.springframework.cloud</groupId>
			<artifactId>spring-cloud-starter-netflix-eureka-server</artifactId>
			<version>3.1.4</version>
		</dependency>
	</dependencies>

	<build>
		<plugins>
			<plugin>
				<groupId>org.springframework.boot</groupId>
				<artifactId>spring-boot-maven-plugin</artifactId>
			</plugin>
		</plugins>
	</build>

</project>
配置application.yml
server:
  port: 8010
spring:
  application:
    name: provider
eureka:
  client:
    service-url:
      defaultZone: http://localhost:8761/eureka
      register-with-eureka: true
      fetch-registry: true
  instance:
    prefer-ip-address: true # 显示client对应的ip和端口
    instance-id: ${spring.cloud.client.ip-address}:${server.port}
server.port指定了服务的端口为8082;spring.application.name指定服务名称为providereureka.client.serviceUrl.defaultZone指定Eureka服务端的地址,这里为上面定义的Eureka服务端地址;eureka.client.register-with-eureka和eureka.client.fetch-registry上面已经解释了其意思,虽然这两个配置的默认值就是true,但这里还是显式配置下,使Eureka客户端的功能更为直观(即向服务端注册服务并定时从服务端获取服务缓存到本地)。
给Eureka-Client添加一些接口方便测试
首先创建一个实体类:Student
@Data
@AllArgsConstructor
@NoArgsConstructor
public class Student {
    private long id;
    private String name;
    private int age;
}
创建Studentd相关的一些增删改查接口:StudentRepository
public interface StudentRepository {
  Collection<Student> findAll();
  Student findById(long id);
  void saveOrUpdate(Student student);
  void deleteById(long id);
}
创建具体的实现类:StudentRepository
@Repository
public class StudentRepositoryImpl implements StudentRepository {
    private static final Map<Long, Student> studentMap;

    static {
        studentMap = new HashMap<>();
        studentMap.put(1L, new Student(1L, "张三", 22));
        studentMap.put(2L, new Student(2L, "李四", 23));
    }

    @Override
    public Collection<Student> findAll() {
        return studentMap.values();
    }

    @Override
    public Student findById(long id) {
        return studentMap.get(id);
    }

    @Override
    public void saveOrUpdate(Student student) {
        studentMap.put(student.getId(), student);
    }

    @Override
    public void deleteById(long id) {
        studentMap.remove(id);
    }
}
创建TestController
import java.util.Collection;

@RestController
public class TestController {
    @Autowired
    private StudentRepository studentRepository;

    @GetMapping("/findAll")
    public Collection<Student> findAll() {
        return studentRepository.findAll();
    }

    @GetMapping("/findById/{id}")
    public Student findById(@PathVariable("id") long id) {
        return studentRepository.findById(id);
    }

    @PostMapping("/save")
    public void save(@RequestBody Student student) {
        studentRepository.saveOrUpdate(student);
    }

    @PutMapping("/update")
    public void update(@RequestBody Student student) {
        studentRepository.saveOrUpdate(student);
    }

    @DeleteMapping("/deleteById/{id}")
    public void deleteById(@PathVariable("id") long id) {
        studentRepository.deleteById(id);
    }
}
RestTemplate基本使用
在入口类中注入RestTemplate
@SpringBootApplication
public class RestTemplateApplication {

    public static void main(String[] args) {
        SpringApplication.run(RestTemplateApplication.class, args);
    }

    @Bean
    public RestTemplate restTemplate() {
        return new RestTemplate();
    }
}
调用前面Eureka-Client的各种增删改查接口:
@RestController
@RequestMapping("rest")
public class IndexController {
    @Autowired
    private RestTemplate restTemplate;
    @GetMapping("/findAll")
    public Collection findAll() {
        //        return restTemplate.getForEntity("http://localhost:8010/findAll",Collection.class).getBody();
        // 和上面的语句作用相同
        return restTemplate.getForObject("http://localhost:8010/findAll",Collection.class);
    }

    @GetMapping("/findById/{id}")
    public Student findById(@PathVariable long id) {
        return restTemplate.getForObject("http://localhost:8010/findById/{id}",Student.class,id);
    }

    @PostMapping("/save")
    public void save(@RequestBody Student student) {
        restTemplate.postForObject("http://localhost:8010/save",student, Student.class);
    }

    @PutMapping("/update")
    public void update(@RequestBody Student student) {
        restTemplate.put("http://localhost:8010/update",student);
    }

    @DeleteMapping("/delete/{id}/")
    public void deleteById(@PathVariable("id") long id) {
        restTemplate.delete("http://localhost:8010//deleteById/{id}",id,Student.class);
    }
}
Feign声明式接口调用
Feign是Spring Cloud提供的声明式、模板化的HTTP客户端, 它使得调用远程服务就像调用本地服务一样简单,只需要创建一个接口并添加一个注解即可。
Spring Cloud Feign,它整合了 Ribbon和Hystrix,Feign还⽀持多种注解;Feign默认集成了Ribbon,所以Feign默认就实现了负载均衡的效果。
新建一个名为Feign的module,修改pom.xml,添加对应依赖
<!--不加这个会报错-->
<dependency>
    <groupId>org.springframework.boot</groupId>
    <artifactId>spring-boot-starter-web</artifactId>
</dependency>

<!--feign的依赖-->
<dependency>
    <groupId>org.springframework.cloud</groupId>
    <artifactId>spring-cloud-starter-openfeign</artifactId>
    <version>3.1.4</version>
</dependency>

<!--该module作为一个client-->
<dependency>
    <groupId>org.springframework.cloud</groupId>
    <artifactId>spring-cloud-starter-netflix-eureka-client</artifactId>
    <version>3.1.4</version>
</dependency>
修改配置文件application.yml
server:
  port: 8100
spring:
  application:
    name: feign
eureka:
  client:
    service-url:
      defaultZone: http://localhost:8761/eureka
      register-with-eureka: true
      fetch-registry: true
  instance:
    prefer-ip-address: true
    instance-id: ${spring.cloud.client.ip-address}:${server.port}
创建声明式接口:FeignProviderClient,下面调用provider中的两个接口,相比于ribbon+restTemplate的实现更加简明:
// 声明要调用的微服务名称
@FeignClient(value = "provider")
public interface FeignProviderClient {
    // 和provider中的接口保持一致
    @GetMapping("/findAll")
    Collection<Student> findAll();
    @GetMapping("/findById/{id}/")
    Student findById(@PathVariable("id") long id);
}
IndexController
@RestController
@RequestMapping("feign")
public class IndexController {
    @Autowired
    private FeignProviderClient feignProviderClient;

    @GetMapping("/findAll")
    public Collection<Student> findAll() {
        return feignProviderClient.findAll();
    }

    @GetMapping("/findById/{id}/")
    public Student findById(@PathVariable("id") long id) {
        return feignProviderClient.findById(id);
    }

}
启动Eureka-Server、provider、feign,访问http://localhost:8100/feign/findAll和http://localhost:8100/feign/findById/1/进行测试。
Hystrix 容错机制
熔断机制
在feign中的pom.xml引入依赖:
<dependency>
    <groupId>org.springframework.cloud</groupId>
    <artifactId>spring-cloud-starter-netflix-hystrix</artifactId>
    <version>2.2.10.RELEASE</version>
</dependency>
新版本的
SpringCloud配置feign.hystrix.enabled: true不生效
在application中添加熔断器配置
feign:
  circuit-breaker:
    enabled: true
创建 FeignProviderClient 接⼝的实现类 FeignError,定义容错处理逻辑,通过@Component注 解将FeignError实例注⼊IoC 容器中。
@Component
public class FeignError implements FeignProviderClient {
    @Override
    public Collection<Student> findAll() {
        System.out.println("调用失败!");
        return null;
    }

    @Override
    public Student findById(long id) {
        System.out.println("调用失败!");
        return null;
    }
}
在 FeignProviderClient定义处通过@FeignClient 的fallback属性设置映射。
@FeignClient(value = "provider",fallback = FeignError.class)
public interface FeignProviderClient {
    // 和provider中的接口保持一致
    @GetMapping("/findAll")
    Collection<Student> findAll();
    @GetMapping("/findById/{id}/")
    Student findById(@PathVariable("id") long id);
}
关闭provider进行测试,此时访问http://localhost:8100/feign/findAll返回空白。
可视化数据监控
在feign中的pom.xml中继续添加依赖
<!--对应用进行监控和管理-->
<dependency>
    <groupId>org.springframework.boot</groupId>
    <artifactId>spring-boot-starter-actuator</artifactId>
</dependency>

<!--可视化界面-->
<dependency>
    <groupId>org.springframework.cloud</groupId>
    <artifactId>spring-cloud-starter-netflix-hystrix-dashboard</artifactId>
    <version>2.2.10.RELEASE</version>
</dependency>
修改配置文件application.yml
server:
  port: 8100
spring:
  application:
    name: feign
eureka:
  client:
    service-url:
      defaultZone: http://localhost:8761/eureka
      register-with-eureka: true
      fetch-registry: true
  instance:
    prefer-ip-address: true
    instance-id: ${spring.cloud.client.ip-address}:${server.port}
feign:
  circuit-breaker:
    enabled: true
# 添加dashboard配置
hystrix:
  dashboard:
    proxy-stream-allow-list: "*"
# 监控所有请求
management:
  endpoints:
    web:
      exposure:
        include: 'hystrix.stream'
修改启动类:FeignApplication
@SpringBootApplication
@EnableEurekaClient
@EnableFeignClients
@EnableCircuitBreaker
@EnableHystrixDashboard
public class FeignApplication {

    public static void main(String[] args) {
        SpringApplication.run(FeignApplication.class, args);
    }

}
启动Eureka-Server、provider、feign
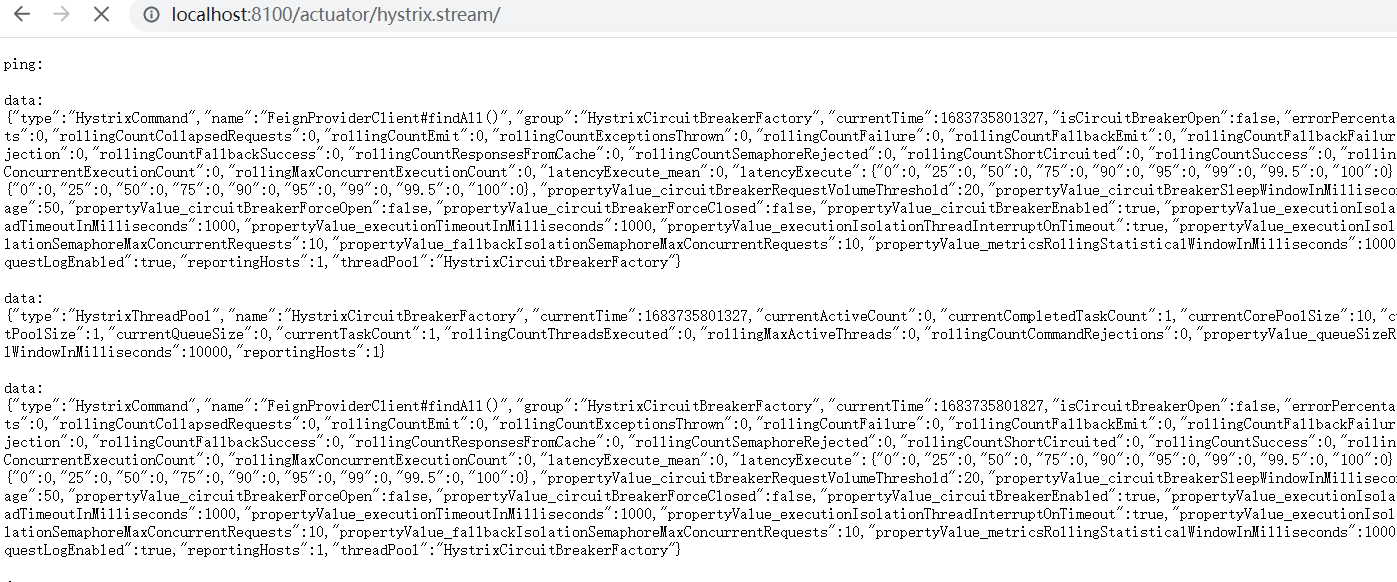
访问http://localhost:8100/actuator/hystrix.stream/可查看实时监控数据
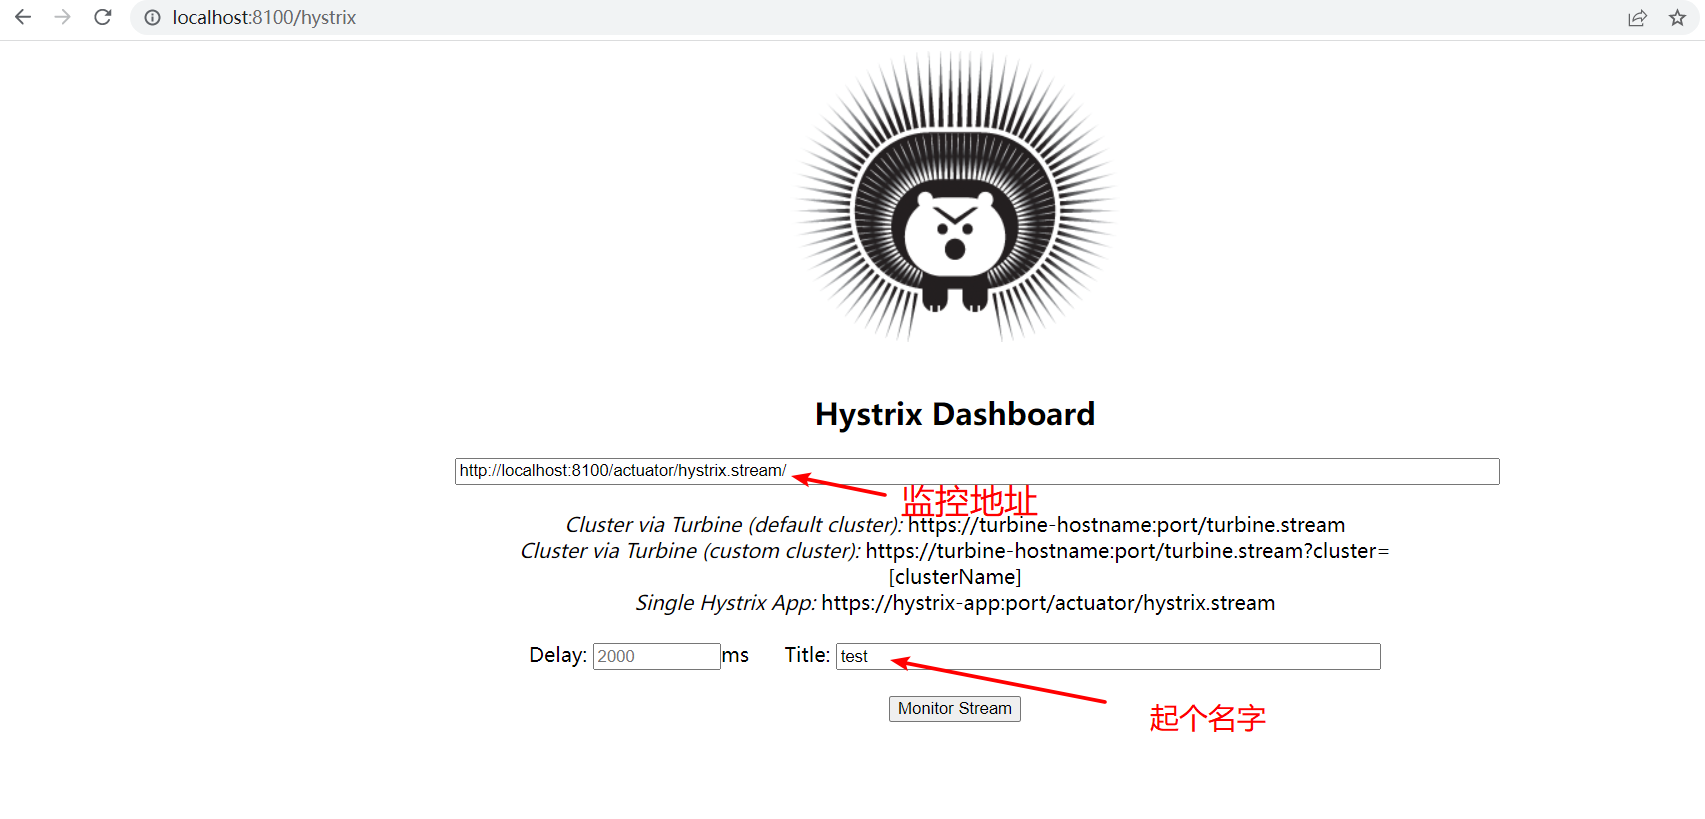
通过hystrix-dashboard进行更直观的监控:

Spring Cloud 配置中心
Spring Cloud Config,通过服务端可以为多个客户端提供配置服务。Spring Cloud Config可以将配置⽂件存储在本地,也可以将配置⽂件存储在远程 Git 仓库,创建Config Server,通过它管理所有的配置文件。
本地配置
创建一个新的module:ConfigServer,用来提供本地Spring Cloud Config配置服务。
pom.xml添加下面的依赖
<dependency>
    <groupId>org.springframework.cloud</groupId>
    <artifactId>spring-cloud-config-server</artifactId>
    <version>3.1.4</version>
</dependency>
配置application.yml
server:
  port: 8762
spring:
  application:
    name: ConfigServer
  profiles:
    active: native
  cloud:
    config:
      server:
        native:
          search-locations: classpath:/shared
在resources下新增一个文件夹shared,再创建一个本地配置文件configclient-dev.yml
server:
  port: 8070
foo: foo version 1
在启动类上添加@EnableConfigServer声明该模块为配置中心
新建客户端调用本地配置
创建一个新的module:ConfigClient,用来调用本地Spring Cloud Config配置服务。
在pom.xml中添加依赖
<!--读取本地配置文件-->
<dependency>
    <groupId>org.springframework.cloud</groupId>
    <artifactId>spring-cloud-starter-config</artifactId>
    <version>3.1.4</version>
</dependency>

<!--Spring Cloud新版本需要手动添加Bootstrap依赖-->
<dependency>
    <groupId>org.springframework.cloud</groupId>
    <artifactId>spring-cloud-starter-bootstrap</artifactId>
    <version>3.1.4</version>
</dependency>
创建bootstrap.yml(名称不能变),配置读取本地配置中心的相关信息
spring:
  application:
    name: configclient
  profiles:
    active: dev # 调用本地配置文件configclient-dev.yml(注意对应)
  cloud:
    config:
      uri: http://localhost:8762 # 调用ConfigServer服务
      fail-fast: true
注解说明:
cloud.config.uri :本地Config Server的访问路径.
cloud.config.fail-fast :设置客户端优先判断Config Server获取是否正常.
通过spring.application.name结合 spring.profiles.active 拼接⽬标配置⽂件名:configclient-dev.yml.
新建一个IndexController用来测试
@RestController
@RequestMapping("native")

public class IndexController {

    @Value("${server.port}")
    private String port;

    @Value("${foo}")
    private String foo;

    @GetMapping("/index")
    public String index() {
        return port + "---" + foo;
    }
}
由于ConfigClient读取的是ConfigServer下保存的configclient-dev.yml.所以ConfigClient使用的端口是该配置文件中指定的8070
访问http://localhost:8070/native/index返回本地配置文件中的信息
8070---foo version 1
远程配置
创建配置文件,上传至git平台
server:
  port: 9000
eureka:
  client:
    serviceUrl:
      defaultZone: http://localhost:8761/eureka/
spring:
  application:
    name: configclient
新建一个远程配置服务模块: ConfigRemoteServer, 在pom.xml中添加下面的依赖
<dependency>
    <groupId>org.springframework.cloud</groupId>
    <artifactId>spring-cloud-config-server</artifactId>
    <version>3.1.4</version>
</dependency>

<dependency>
    <groupId>org.springframework.cloud</groupId>
    <artifactId>spring-cloud-starter-netflix-eureka-client</artifactId>
    <version>3.1.4</version>
</dependency>

<!--eureka-client需要添加下面的依赖-->
<dependency>
    <groupId>org.springframework.boot</groupId>
    <artifactId>spring-boot-starter-web</artifactId>
</dependency>
配置application.yml
server:
  port: 8888
spring:
  application:
    name: ConfigRemoteServer
  cloud:
    config:
      server:
        git:
          uri: https://github.com/xxx/xxx.git
          searchPaths: config # 配置文件在仓库中的哪个文件夹
          username: root
          password: root
      label: master
eureka:
  client:
    serviceUrl:
      defaultZone: http://localhost:8761/eureka # 注册中心的地址
在启动类上加上EnableConfigServer注解
@SpringBootApplication
@EnableConfigServer
public class ConfigRemoteServerApplication {

    public static void main(String[] args) {
        SpringApplication.run(ConfigRemoteServerApplication.class, args);
    }

}
新建客户端调用远程配置
新建一个组件ConfigRemoteClient,在pom.xml添加依赖
<dependency>
    <groupId>org.springframework.cloud</groupId>
    <artifactId>spring-cloud-starter-config</artifactId>
    <version>3.1.4</version>
</dependency>

<dependency>
    <groupId>org.springframework.cloud</groupId>
    <artifactId>spring-cloud-starter-netflix-eureka-client</artifactId>
    <version>3.1.4</version>
</dependency>

<!--Spring Cloud新版本需要手动添加Bootstrap依赖-->
<dependency>
    <groupId>org.springframework.cloud</groupId>
    <artifactId>spring-cloud-starter-bootstrap</artifactId>
    <version>3.1.4</version>
</dependency>
<!--eureka-client需要添加下面的依赖-->
<dependency>
    <groupId>org.springframework.boot</groupId>
    <artifactId>spring-boot-starter-web</artifactId>
</dependency>
创建bootstrap.yml(名称不能变),配置读取远程配置中心的相关信息
spring:
  cloud:
    config:
      name: configclient # 远程仓库中配置文件名称
      label: master
      discovery:
        enabled: true
        service-id: ConfigRemoteServer # 远程配置服务在注册中心中的服务名
# 配置服务中心地址
eureka:
  client:
    serviceUrl:
      defaultZone: http://localhost:8761/eureka/
spring.cloud.config.name :当前服务注册在Eureka Server上的名称,与远程仓库的配置⽂件名对应。
spring.cloud.config.label :Git Repository 的分⽀。
spring.cloud.config.discovery.enabled :是否开启 Config 服务发现⽀持。
spring.cloud.config.discovery.service-id :远程配置服务在注册中心中的服务名
新建一个IndexController用来测试
package cc.bnblogs.configremoteclient.controller;

import org.springframework.beans.factory.annotation.Value;
import org.springframework.web.bind.annotation.GetMapping;
import org.springframework.web.bind.annotation.RequestMapping;
import org.springframework.web.bind.annotation.RestController;

@RestController
@RequestMapping("remote")
public class IndexController {

    @Value("${server.port}")
    private String port;

    @Value("${spring.application.name}")
    private String name;

    @GetMapping("/index")
    public String index() {
        return port + "---" + name;
    }
}
由于ConfigRemoteClient读取的是远程仓库中保存的configclient.yml.所以ConfigClient使用的端口是该配置文件中指定的9000端口
访问http://localhost:9000/remote/index返回的是远程配置文件中的信息
9000---configclient
如果修改了配置文件,重启项目即可读取到最新配置
Zipkin服务跟踪
Zipkin是⼀个可以采集并且跟踪分布式系统中请求数据的组件,让开发者可以更加直观的监控到请求在各个微服务所耗费的时间等,Zipkin包括Zipkin Server、Zipkin Client。
Zipkin Server
从spring boot 2.0开始,官方就不再支持使用自建Zipkin Server的方式进行服务链路追踪,而是直接提供了编译好的 jar包来给我们使用。
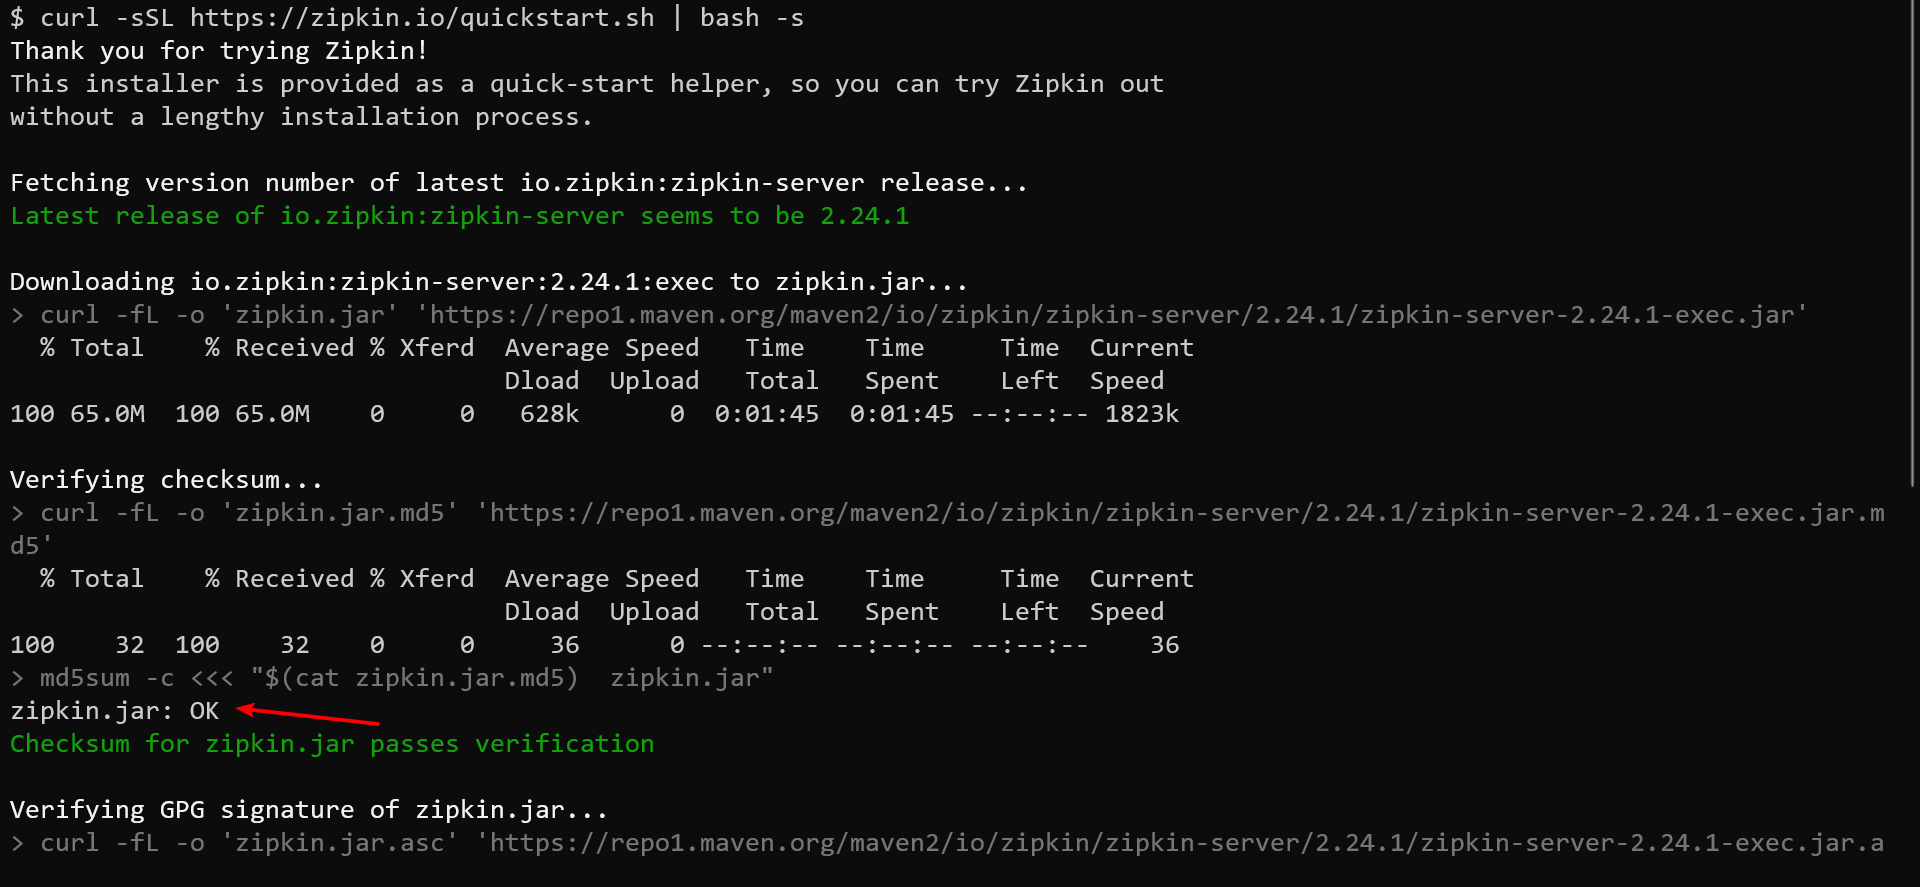
使用下面的命令即可:
curl -sSL https://zipkin.io/quickstart.sh | bash -s
java -jar zipkin.jar --server.port=9090
Zipkin Client
所有的微服务模块都可以配置链路追踪!
这里我们配置之前的模块provider作为zipkin-client,在pom.xml中添加下面的依赖
<dependency>
    <groupId>org.springframework.cloud</groupId>
    <artifactId>spring-cloud-starter-zipkin</artifactId>
    <version>2.2.8.RELEASE</version>
</dependency>
修改application.yml
server:
  port: 8010
spring:
  main:
    allow-circular-references: true
  application:
    name: provider
  zipkin:
    base-url: http://localhost:9090/ # 服务端地址
    sender:
      type: web                      # 数据传输方式,web 表示以 HTTP 报文的形式向服务端发送数据
  sleuth:
    sampler:
      probability: 1.0               # 收集数据百分比,默认 0.1(10%)
eureka:
  client:
    service-url:
      defaultZone: http://localhost:8761/eureka
      register-with-eureka: true
      fetch-registry: true
  instance:
    prefer-ip-address: true
    instance-id: ${spring.cloud.client.ip-address}:${server.port}
management:
  info:
    env:
      enabled: true
  endpoints:
    web:
      exposure:
        include: "*"
      base-path: /actuator
  endpoint:
    shutdown:
      enabled: true
    health:
      show-details: always
配置说明:
spring.sleuth.web.client.enabled:设置开启请求跟踪
spring.sleuth.sampler.probability:设置采样⽐例,默认是 1.0
spring.zipkin.base-url:Zipkin Server地址
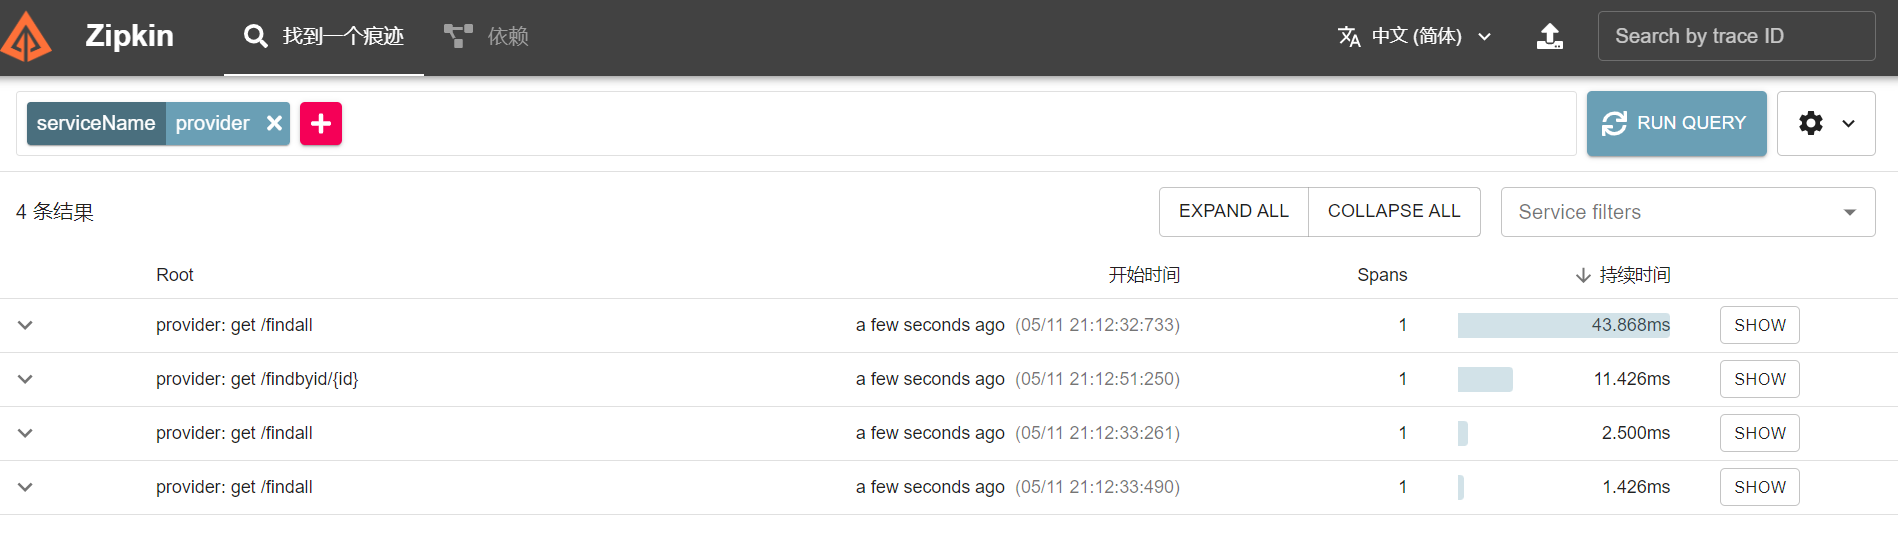
访问接口http://localhost:8010/findAll和http://localhost:8010/findById/1/进行测试,成功追踪到链路。